Freebies, Scrapbooking

Christmas phrases

Hi there!
Here’s another project of mine that I would like to share with you and I am so totally excited about it!
My crafty friend Anastasia (http://instagram.com/bubzig#) gave me a good idea how I could use my handwriting! I was recently into writing with black ink and a soft brush, such a fun technique! And the next step was to create cut files for the silhouette cameo plotter.
The only time consuming part was to write a word in a way that I like, so I had to try multiple times. But afterwards I just needed to scan and trace in the cameo application. And that’s it! If you are interested, a link to download the .studio file is below. Enjoy!

20131208-120839.jpg

Here you can see the phrases that are in the .studio file.
Cutphrases

CLICK HERE TO DOWNLOAD

I’ve also tried gold embossing, white embossing and silver glitter cardstock
20131208-114019.jpg

And actually you can combine other phrases out of the words πŸ™‚
20131208-114111.jpg

Below you can see work in progress. This is how many times I’ve tried to write :)))
Never comes that easy, had to try several times until I was happy with the result.

handwriting

Have a great weekend!
-O

Standard
Project Life, Scrapbooking

December project life cards

I think I am rather a creator than a projectlifer πŸ™‚
I realized how much I enjoy creating! I would rather design some cards and not fill project life pockets, and once I’ve started it’s hard to stop the flow, one idea follows another. The only problem I have – time! Working full time in the office and playing in the orchestra leaves just couple of hours a week…
It is unfortunate, but I am trying to adapt and do best with the time I have πŸ™‚

Couple of weeks ago I had an idea to create a very small project life kit, where I could play around with different techniques. And once it was done I decided to actually duplicate or triplicate it to send to 2 lovely scrapbooking ladies here in Germany.
I’d like to share a little bit of a process and share some simple ideas that might inspire you πŸ™‚

So this is a list of supplies I’ve used:
* white and craft card stock
* silver glitter paper
* black and white ink
* silver acrylic paint
* silver embossing powder
* white ink pad
* wood veneer
* washi tape
* stamps
* spotting sponge brush

20131202-194429.jpg

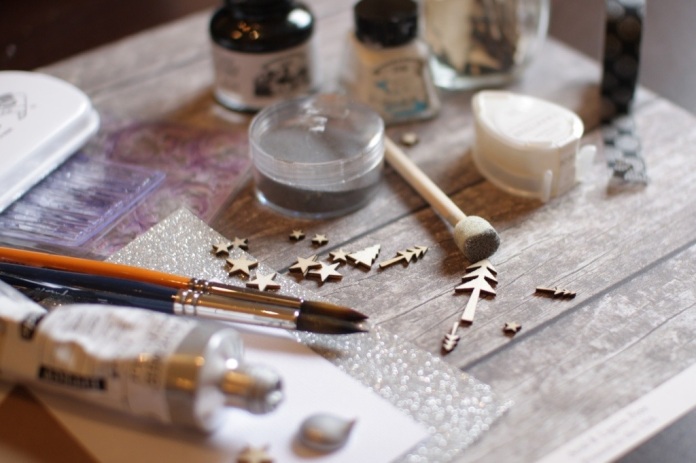
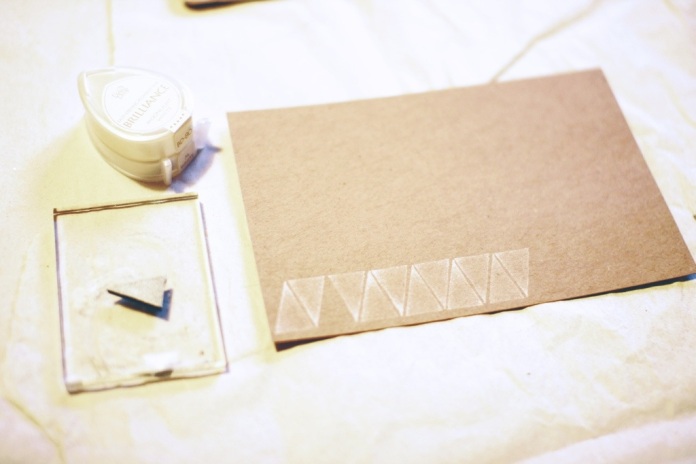
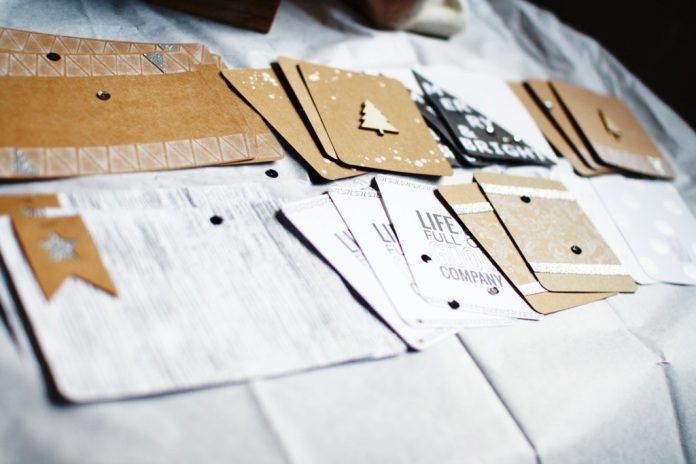
On the upper part of this picture you can actually see the example set I’ve created.
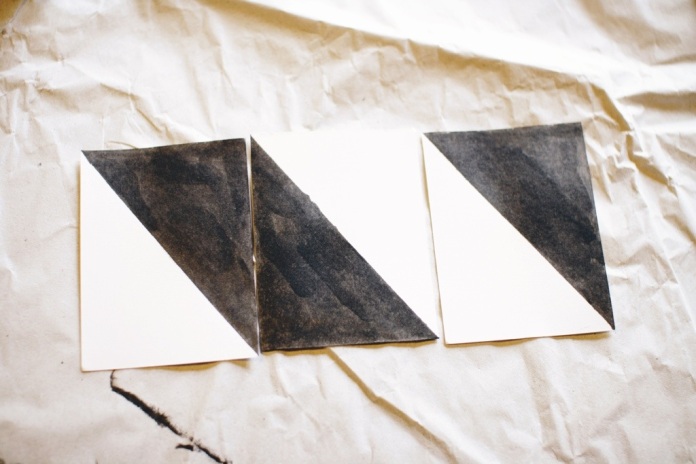
To create black and white diagonal card I’ve used washi tape to have a straight line and then painted one half of the card with a black ink.
20131202-194459.jpg

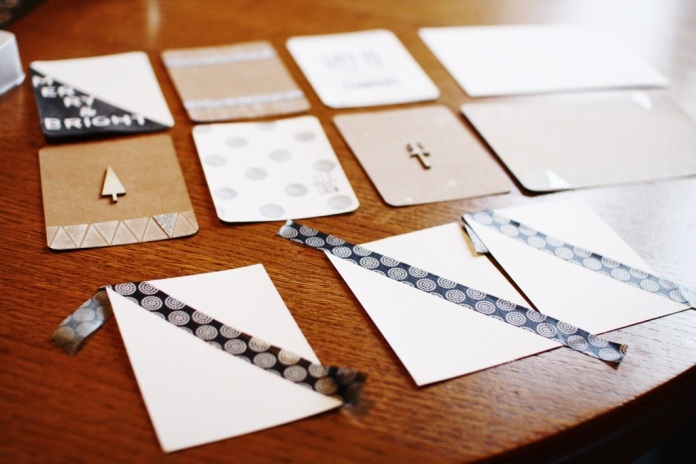
I didn’t try to cover it evenly, but rather to get a little bit distressed look. Otherwise you might want to cover it twice.
20131202-194537.jpg

Then I had an idea of a card with white stamped pattern that would cover only part of the card. So I’ve used the washi again to do this masking trick.
20131202-194543.jpg

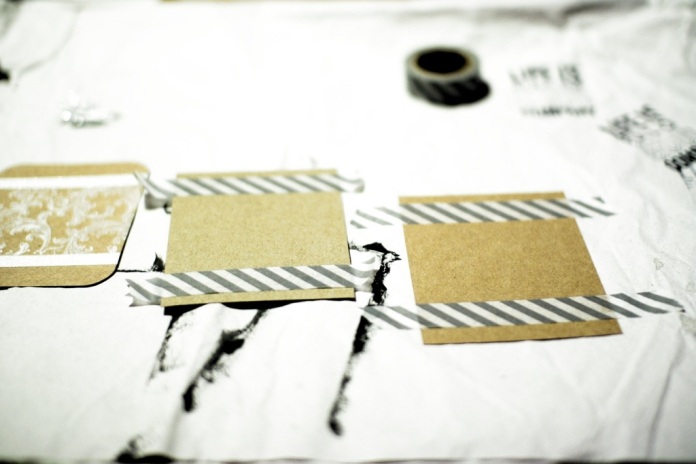
For the two triangle cards I’ve cut a triangle out of self adhesive rubber (it’s from a random hardware store) and just stamped it along the card. For some triangles I cut out same shaped triangles out of glitter paper.
20131202-194557.jpg

And those are the cards together.
Actually I realized only now that I put there another craft stamped card than I originally used for a kit πŸ™‚ Oops…
20131202-194615.jpg

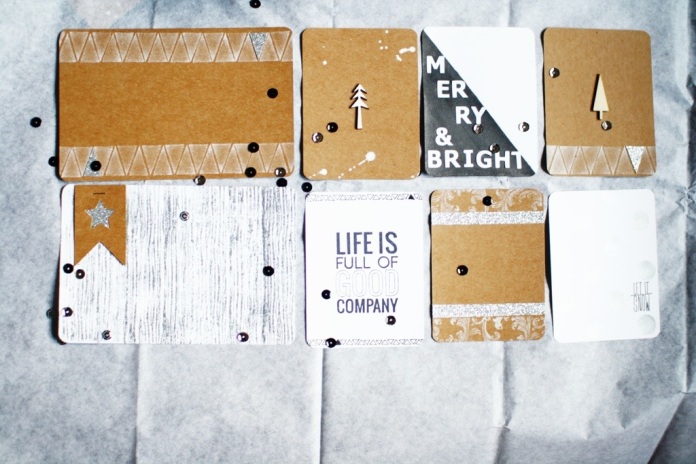
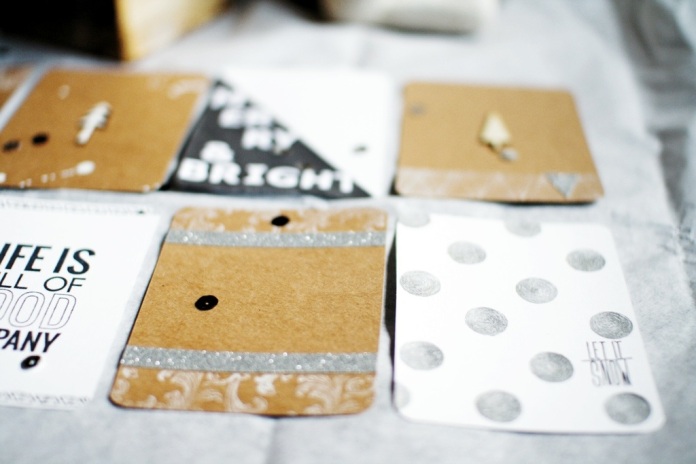
Unfortunately I didn’t photograph how I’ve made this lovely dotted “let it snow” card. But it’s really easy! I’ve used the kind of circle sponge brush (you can see it on the first photo). I used silver acrylic paint to create those dots.
20131202-194622.jpg

And this card is embossed with silver embossing powder, I’ve used a tree pattern stamp and finished the card with my banner that I cut with a silhouette cameo machine. If you are interested you can download tags and banners cut file HERE
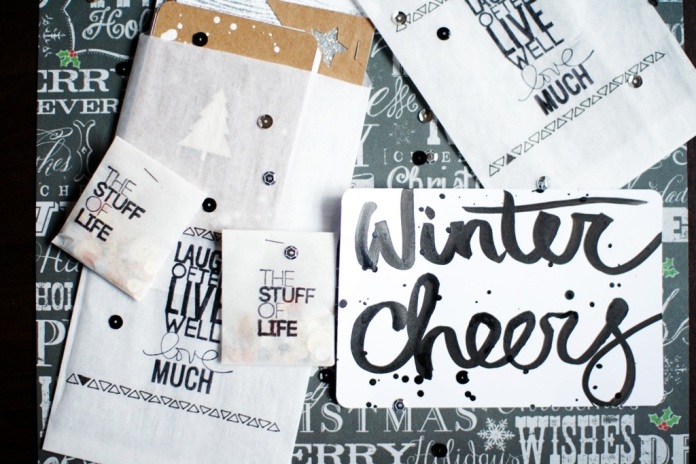
20131202-194628.jpg

All three kits together πŸ™‚
20131202-194639.jpg

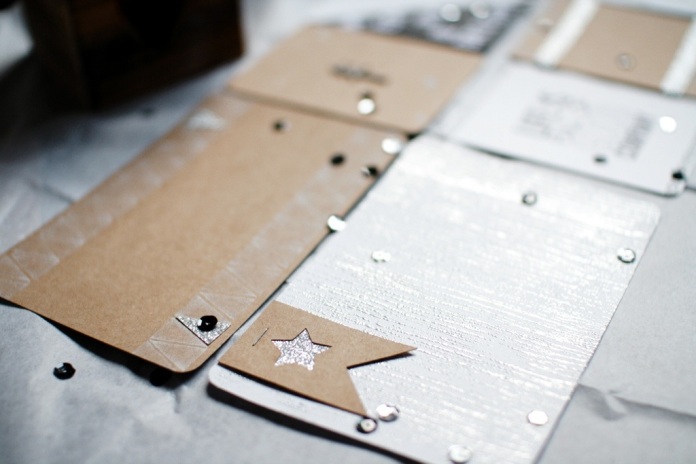
And of course I had to create my own packaging! I love details!
I had half transparent packing paper which I cut and glued into little paper bags. And I used my favorite stamps to create a finished look that matches the cards πŸ™‚
I’ve also made some kind of postcard to the package which says “winter cheers”. I painted it with a soft brush and black ink.
20131202-194645.jpg

Have a lovely December!
-O

Standard
Freebies, Scrapbooking

Free download: tags and banners

In this part of the world its raining and cold, about 7C degrees, days grow shorter, the winter is coming.. Meaning, Christmas is coming! Yay!

If you read my previous post you might have noticed that I talked about tags and banners that I have cut using my cameo. I actually quickly desinged them for my december daily album, but after a few requests I decided to share the file with all of you. Feel free to use it for your projects. Please private use only! And of course I would be glad if you link me back with your projects.

photo(7)

DOWNLOAD

Have a beautiful sunday!

-O

Standard
Scrapbooking

Christmas mood board

So I had an idea in my head to make a December daily album for a long time. If you are not familiar with the term: this is a scrapbook style photo album where you basically document every day of December, document kind of winter holiday mood.
Then I started to think of supplies. I saw a couple of scrapbooking kits available on the market, but none really represented the mood and color pallet I wanted my album to have.
So then I thought of creating my own kit. And of course I needed a mood board to help me with the colors and ideas! I’ve drilled through Pinterest searching for photos that I like, but at some point I felt that I need this mood board be life and 3D πŸ™‚

And here it comes! I printed our photos from Pinterest and simply glued them to an empty canvas, added couple of touches and that’s it. Really easy!

20131108-204309.jpg

My mood is about white, beige, brown colors, gold and silver, glitter, transparencies, cork, soft lights, coziness, home.
This mood board is also about handwriting. I want to use brush and ink to write phrases and words I find important and appropriate.

20131108-202234.jpg

I’ve designed tags and banners for my kit, you might have seen them in Instagram, 3 of them are on this mood board.
20131108-202258.jpg

20131108-202310.jpg

20131108-202506.jpg

You can refer to my mood board for photo credits on Pinterest via link: http://www.pinterest.com/olye/dd/

P.S.: this is a first time I am blogging via iPad, quite interesting feeling πŸ™‚ So many things I much faster than on the computer, just typing is slower.

Have a good one!
-O

Standard
Scrapbooking

Happy Little Moments

Hi πŸ™‚

I know, I know. I’ve joined the group of lazy bloggers who fail to update their blogs πŸ˜‰ Trying hard to change it!
There are just so many things going on that it’s hard to keep up! And August just kicked me out of normal life..
Also I am now officially back to the orchestra where we are currently preparing for the new program: Dvorak “Czech Suite” and beautiful violin romance, as well as Mendelssohn Symphony 1. And that really eats lots of my time.

Besides working full time and the orchestra there are still crafting projects ongoing. I have finished quite some projects, but they didn’t end up in my blog, at least not yet. Have to learn from that, currently trying to analyze why this happened. Is it only the time problem or is it the inconvenience of publishing photos here and writing text? I am quite active in instagram, this is just so easy: you make a photo, you do fast editing without copying your photos from mobile to computer, you write some short text, you post it – ready! I could of course still use my mobile to make posts in my blog, you’d say. Good idea, I’d answer! I will try that once. But the difference is a device you as a reader are using afterwards, it is clear that I cant just upload a tiny photo on the blog and expect someone using 24″ monitor enjoy it. It might look good on your iPhone, but I really do not like how it looks on the big monitor.

I actually have more thoughts about keeping up with the blog and, in general, keeping up with projects, I will make a note in my to-do list to share those thoughts with you.

But for now let me share with you my third layout I’ve created back in July (how comes the time went by so fast?).

This photo was made on Mallorca in March this year, we had a girls-only vacation in an amazing apartment just in the center of Palma de Mallorca. That was the time… 100% worth to capture and document!
IMG_2570-1

IMG_2576s

IMG_2577s

I have a hidden journaling on this page, I needed to write down somethings, but didn’t want to do it directly on the layout, so it is hidden inside a pocket πŸ™‚

IMG_2578s

Have a nice one!
-O

Standard
Scrapbooking

Driven by Music

Hi,

Today I wanted to share with you a page that I’ve made a couple of months ago.

Mostly, I am not into 12×12 scrapbooking layouts, I am having enough fun with project life, so there isn’t much time left for alternatives πŸ™‚
Actually I call it my first layout πŸ™‚ As it is partly true. I had much fun creating it, maybe I will try such format more often!
Anyhow, this is the page! I tried to use bright colors and express my love to music πŸ˜‰ I am not a writer, so even the title for this page didn’t come out so easily, I even had to ask my friends for advises :-O
The photo I’ve used was made by a very nice colleague of mine Andreas, who is also a photographer, here you can check his blog.

Driven by Music

And a bit of details. Love those little splatters of ink!

IMG_0579

I’ve used some Studio Calico papers, stickers, brads and wood veneer.

IMG_0577

Be the best you can be πŸ™‚
-O

Standard
Project Life, Scrapbooking

Project Life | Week 23

Hello there!

I appreciate your patience πŸ™‚ I am trying to catch up with updating my blog and with my project life after the vacation.
My camera is full of photos which need to be sorted and honestly not sure what would be the best way to store the photos. I am thinking of printing photo books with those photos as some of them are really precious to me!
But for now here is my project life week 23.
I apologize for grayish photos, it would be so easy with iPhone apps which whiten photos for you πŸ˜‰

IMG_2121

This is the left side in progress.

IMG_4902

And the result.
IMG_2124

IMG_2086

Right side. I was trying to keep the whole spread as simple as it was possible for me. Overall I like the result, but still need to practice my simplicity πŸ™‚

IMG_2083

IMG_2085

Enjoy your Sunday!

-O

Standard
Project Life, Scrapbooking

Project Life | Week 22

Being busy, I have only limited time for my project life. But still.. I cannot manage the level of simplicity I would like to reach on my spreads. I love tiny little details πŸ™‚

IMG_2117

I had fun adhering these tiny confetti dots! Love this detail.
IMG_2057

IMG_2059

IMG_2061

Right side.

IMG_2120

My beloved sea theme fits also for documenting high water in Heidelberg.

IMG_2076

IMG_2056Β Β Β Β IMG_2062

And the whole spread:

IMG_2118

Wishing you a happy weekend!

-O

Standard
Project Life, Scrapbooking

Project Life | Week 21

IMG_1966

It’s week 21 and I am still trying to keep it simple. That doesn’t really work as much as I would like it to, which made me realize that keeping it simple is not actually a simple task πŸ™‚

Another task I had for this spread is to use my stash. I had half of a pack of 6×6 pattern paper pad. That happens to me all the time – I just use part of the pad and the rest stays there, I buy new paper and forget old one. But not this time! I pulled out my Basic Grey cottage collection and tried to use it to the end. I think I must do it more often to avoid hoarding older collections:)

IMG_1964

I adore sea theme. I love sea, I love northern seas more and all the sea symbols like anchors,Β ships and seagulls, you name it. But I haven’t been at the sea for a while now, but I had good chance to use my supplies from studio calico to create a card about exchanging tags and cameo die cuts with a wonderful girl from Hamburg. And oh I love Hamburg, what a beautiful port city.

IMG_1957

Right side.

IMG_1965

Here I’ve used a quote card from ILS and covered it with Crate Paper overlay, which is actually for photos, but I thought it gives a really nice effect for paper as well.

I’ve noted down what I love to do currently: fencing, running, cello, painting, art. Β There was no space left otherwise I could have continued listing my hobbies πŸ™‚

IMG_1961

IMG_1963

Thanks for stopping by!

-O

Standard
Project Life, Scrapbooking

Project Life | Week 19

That was my birthday week.
My goal was to keep the spread as simple as possible, but still give an impression of who I am now, what do I like.

IMG_1944

Left side.
Funny thing – 2 photos on the bottom are actually not one panorama photo which I cut in 2 pieces. I didn’t notice that they look like one shot, only after I was going through my photos which were printed in the lab I realized that and placed them together.
IMG_1937

Right side.

I am quite happy how the quiche card on the top right corner turned out, almost with a recipe πŸ™‚
IMG_1939

I’ve used printables and stamps from studio calico This is Me class.

IMG_1941

One of my favorite details – the card in the center which points on what I am enjoying a lot currently.

IMG_1942

Love these quote cards from Elise Blaha (www.eliseblaha.typepad.com), this one really fits here.
IMG_1943

Happy Friday!

-O

Standard